S1 Uniforms - Standard Operating Procedures: Difference between revisions
Dujakovic.R (talk | contribs) |
|||
| (14 intermediate revisions by 5 users not shown) | |||
| Line 41: | Line 41: | ||
*Ensure that all clerks are performing their job adequately and are fulfilling the minimum requirements. | *Ensure that all clerks are performing their job adequately and are fulfilling the minimum requirements. | ||
*Inspect and upload finished images to the website. | *Inspect and upload finished images to the website. | ||
*Log all updates on the [https://docs.google.com/spreadsheets/d/ | *Log all updates on the [https://docs.google.com/spreadsheets/d/1Yk7cUGWXkSLwirfGWpp0sFoV7KRveeTrNymXjwSN3vo/edit#gid=396600971 Uniforms Accountability Tracker.] | ||
*ICS new clerks entering the department [https://7cav.us/threads/s1-checklist-adding-personnel-to-the-department.36821/ (checklist)]. | *ICS new clerks entering the department [https://7cav.us/threads/s1-checklist-adding-personnel-to-the-department.36821/ (checklist)]. | ||
*Be around to answer questions and check up on the clerks. | *Be around to answer questions and check up on the clerks. | ||
| Line 100: | Line 100: | ||
The dimensions of the nameplates must not be altered. | The dimensions of the nameplates must not be altered. | ||
===Creating a new Uniform=== | |||
<b><I> When Creating a new trooper uniform, use the following steps.</b></i> | |||
*Open the Uniform template. | |||
*Click File, then "SAVE AS". | |||
*In the XCF folder "SAVE AS" the troopers name. Written as follows, "lastname-firstname" All lowercase. | |||
*Hit "SAVE" - you can make the uniform. | |||
*Then "SAVE" and export to the appropriate awaiting check folder. | |||
==Medals and Ribbons== | ==Medals and Ribbons== | ||
| Line 136: | Line 144: | ||
====Leaves==== | ====Leaves==== | ||
Adding leaf clusters to ribbons and medals is simple and follows the same method as medals (see above). A trooper will receive 1 bronze leaf cluster for every duplicate ribbon/medal (if it uses leaf clusters) after the 1st. For example, the second MSM a trooper receives will warrant 1 bronze leaf, the 3rd award will warrant 2 bronze leaves, etc. A silver leaf is equivalent to 5 bronze leaves (6th award). A gold leaf is equivalent to 10 bronze or 2 silver leaves (11th award). | Adding leaf clusters to ribbons and medals is simple and follows the same method as medals (see above). A trooper will receive 1 bronze leaf cluster for every duplicate ribbon/medal (if it uses leaf clusters) after the 1st. For example, the second MSM a trooper receives will warrant 1 bronze leaf, the 3rd award will warrant 2 bronze leaves, etc. A silver leaf is equivalent to 5 bronze leaves (6th award). A gold leaf is equivalent to 10 bronze or 2 silver leaves (11th award). | ||
| Line 148: | Line 155: | ||
*10th Award = 1 Silver Leaf and 4 Bronze Leaves | *10th Award = 1 Silver Leaf and 4 Bronze Leaves | ||
*11th Award = 1 Gold Leaf | *11th Award = 1 Gold Leaf | ||
====Game Centurion Medals and Ribbons==== | |||
Each game that is of company size is eligible for it's own game centurion medal and ribbon. This medal and ribbon, with replace the old centurion medal, and instead give each specific game a ribbon and medal. Each will have leaf attachments to signify the number of operations attended in that game. Once a game is no longer supported, the medal and ribbon will be retired. Below are levels for the leaf attachment. | |||
*50 - 1 Silver Leaf | |||
*100 - 1 Gold Leaf | |||
*150 - 1 Gold and 1 Silver Leaf | |||
*200 - 2 Gold Leaves | |||
*250 - 2 Gold and 1 Silver Leaf | |||
*300 - 3 Gold Leaves [Max Award] | |||
====Stars==== | ====Stars==== | ||
| Line 239: | Line 255: | ||
===Cords=== | ===Cords=== | ||
Cords are ONLY given to NCOs and Enlisted troopers. If a trooper is promoted to officer, the cord is taken away. | Cords are ONLY given to NCOs and Enlisted troopers. If a trooper is promoted to officer, the cord is taken away. | ||
(With the exception of officers who have a role as Aide to Regimental Staff) | |||
The most common types of cord given out are as follows... | The most common types of cord given out are as follows... | ||
| Line 328: | Line 345: | ||
*Master Aircrew Badge | *Master Aircrew Badge | ||
Each | Each uniform is only allowed a maximum of 3 badges on the right pocket underneath the ribbons. Weapon Qualifications are replaced by badges in order to fit all 3 badges. The least prestigious qualifications are replaced first. As the more prestigious awards are added, space permitting; the least prestigious awards will be removed from the uniform, and will instead be displayed in the troopers milpac only. | ||
Aviation and Infantry MOS related badges will only be displayed inside that MOS. For example, Pilots will not have Infantry badges on their Uniform, and Infantrymen will not have Aviator Wings. The only exception to this rule, is if an aviation MOS trooper, hasn't yet earned an aviation badge, or vise versa. | |||
* | The list of awards this applies to is below: | ||
* | |||
* | *Army Aviator Badge | ||
*Senior Aviator Badge | |||
*Master Aviator Badge | |||
*Aircrew Badge | |||
*Senior Aircrew Badge | |||
*Master Aircrew Badge | |||
*EIB | |||
*CIB | |||
*CIB2 | |||
*CIB3 | |||
*CIB4 | |||
===Jump Wings=== | ===Jump Wings=== | ||
| Line 397: | Line 424: | ||
|- | |- | ||
| style="width: 80px; text-align: center;" data-mce-style="width: 80px; text-align: center;" |[[File:ROOCrest.png|100px]] | | style="width: 80px; text-align: center;" data-mce-style="width: 80px; text-align: center;" |[[File:ROOCrest.png|100px]] | ||
| style="width: 375px;" data-mce-style="width: 375px;" |Recruitment | | style="width: 375px;" data-mce-style="width: 375px;" |Recruitment Oversight Office (ROO) | ||
|- | |- | ||
| style="width: 80px; text-align: center;" data-mce-style="width: 80px; text-align: center;" |[[File: | | style="width: 80px; text-align: center;" data-mce-style="width: 80px; text-align: center;" |[[File:Rrd crest.png|100px]] | ||
| style="width: 375px;" data-mce-style="width: 375px;" | | | style="width: 375px;" data-mce-style="width: 375px;" |Regimental Recruitmenting Department (RRD) | ||
|- | |||
| style="width: 80px; text-align: center;" data-mce-style="width: 80px; text-align: center;" |[[File:TRADOC.png|100px]] | |||
| style="width: 375px;" data-mce-style="width: 375px;" |Recruit Training Command (RTC) | |||
|- | |- | ||
| style="width: 80px; text-align: center;" data-mce-style="width: 80px; text-align: center;" |[[File:TRADOC small.png|100px]] | | style="width: 80px; text-align: center;" data-mce-style="width: 80px; text-align: center;" |[[File:TRADOC small.png|100px]] | ||
| style="width: 375px;" data-mce-style="width: 375px;" |S7 Training | | style="width: 375px;" data-mce-style="width: 375px;" |S7 Training | ||
|- | |||
| style="width: 80px; text-align: center;" data-mce-style="width: 80px; text-align: center;" |[[File:ODSCrest.png|100px]] | |||
| style="width: 375px;" data-mce-style="width: 375px;" |Officer Development School (ODS) | |||
|- | |||
| style="width: 80px; text-align: center;" data-mce-style="width: 80px; text-align: center;" |[[File:Ncoacrestblack.png|100px]] | |||
| style="width: 375px;" data-mce-style="width: 375px;" |Non-Commissioned Officer Academy (NCOA) | |||
|- | |||
| style="width: 80px; text-align: center;" data-mce-style="width: 80px; text-align: center;" |[[File:S1Crest.png|100px]] | |||
| style="width: 375px;" data-mce-style="width: 375px;" |General Staff | |||
|- | |- | ||
|} | |} | ||
| Line 468: | Line 507: | ||
*Rifle | *Rifle | ||
*Grenade | *Grenade | ||
*Tank Weapons | |||
*M203 Launcher | *M203 Launcher | ||
*Machine Gun | *Machine Gun | ||
| Line 473: | Line 513: | ||
*Pistol | *Pistol | ||
*Aeroweapons | *Aeroweapons | ||
*Carbine | |||
*Auto Rifle | |||
*Hydra 70 | |||
These weapon attachments above are in order as they should appear on the uniform. For example, if a person has an expert qualification with both the rifle and the grenade, the rifle should always be on top. | These weapon attachments above are in order as they should appear on the uniform. For example, if a person has an expert qualification with both the rifle and the grenade, the rifle should always be on top. | ||
Latest revision as of 11:59, 11 August 2024
| This is the Document Release Information | |
| Article Number: | 7CAV-DR-021 |
| Scope: | S1 Department - Uniforms Standard Operating Procedures |
| Version: | Version 1.0 |
| Effective Date: | 27MAY20 |
| Last Modified Date: | DDMMMYYYY |
| Approving Authority: | S1 Officer in Charge |
| Point of Contact: | S1 Officer in Charge |
Introduction
This Standard Operating Procedure covers all aspects of the S1 Uniforms Branch.
Requirements
Necessary Tools for a S1 Uniforms Clerk
- Must have GIMP (Free photo editing / manipulation software)
- Must receive an NextCloud account (Given by S1 Staff upon entry into the department)
- Must have access to the S1 Uniforms Tracker (Given by NCOIC upon entry into the department.)
- Must have at least 5 GBs of space on computer (For syncing NextCloud folder to PC. This is optional but very highly recommended.)
- Screenshot software. (Gyazo, Puush et.c. This is optional but is extremely useful for troubleshooting and teaching purposes.)
Duties of S1 Uniform Clerks
- Ensure that all updates under their Area of Operations are completed in a timely manner.
- Must meet the minimum requirements
Note: Updates are to be completed within 48 hours of being added to the tracker. If a ticket runs overdue, then any clerk is entitled to complete the change.
Duties of an S1 Uniforms AO Lead
- Take care of his/her Area of Operation(s) like all other clerks.
- Watch the forums and add new updates to the tracker (Awards, Promotions, etc.)
- Training new clerks entering the department.
- Be around to answer questions from clerks.
- Must know the SOP and be able to correct mistakes.
- Help the S1 Uniforms Staff Lead with his duties if necessary.
Duties of S1 Uniforms Staff Lead
- Ensure that all clerks are performing their job adequately and are fulfilling the minimum requirements.
- Inspect and upload finished images to the website.
- Log all updates on the Uniforms Accountability Tracker.
- ICS new clerks entering the department (checklist).
- Be around to answer questions and check up on the clerks.
- Must know the SOP and be able to correct mistakes.
- Ensure that the uniforms in Arlington Cemetery are up-to-date whenever there are changes to the template or SOP if applicable.
- Respond to Helpdesk tickets. (Given access upon taking NCOIC S1 Uniforms Staff Lead position.)
- Perform the duties of the AO Lead if necessary.
Gimp
Gimp is a free photo editing and manipulation software. This is critical to creating and modifying a uniform.
Startup
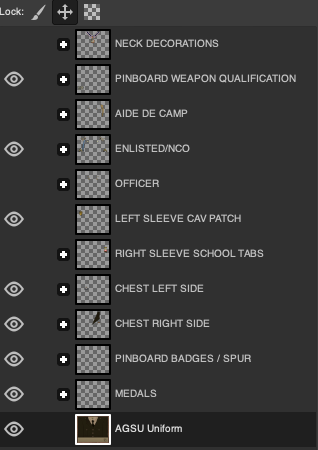
Open the .XCF file of the uniform you want to update. In default configuration, GIMP should look like this. The following is an example of the S1 Uniform Template used for all new recruits.
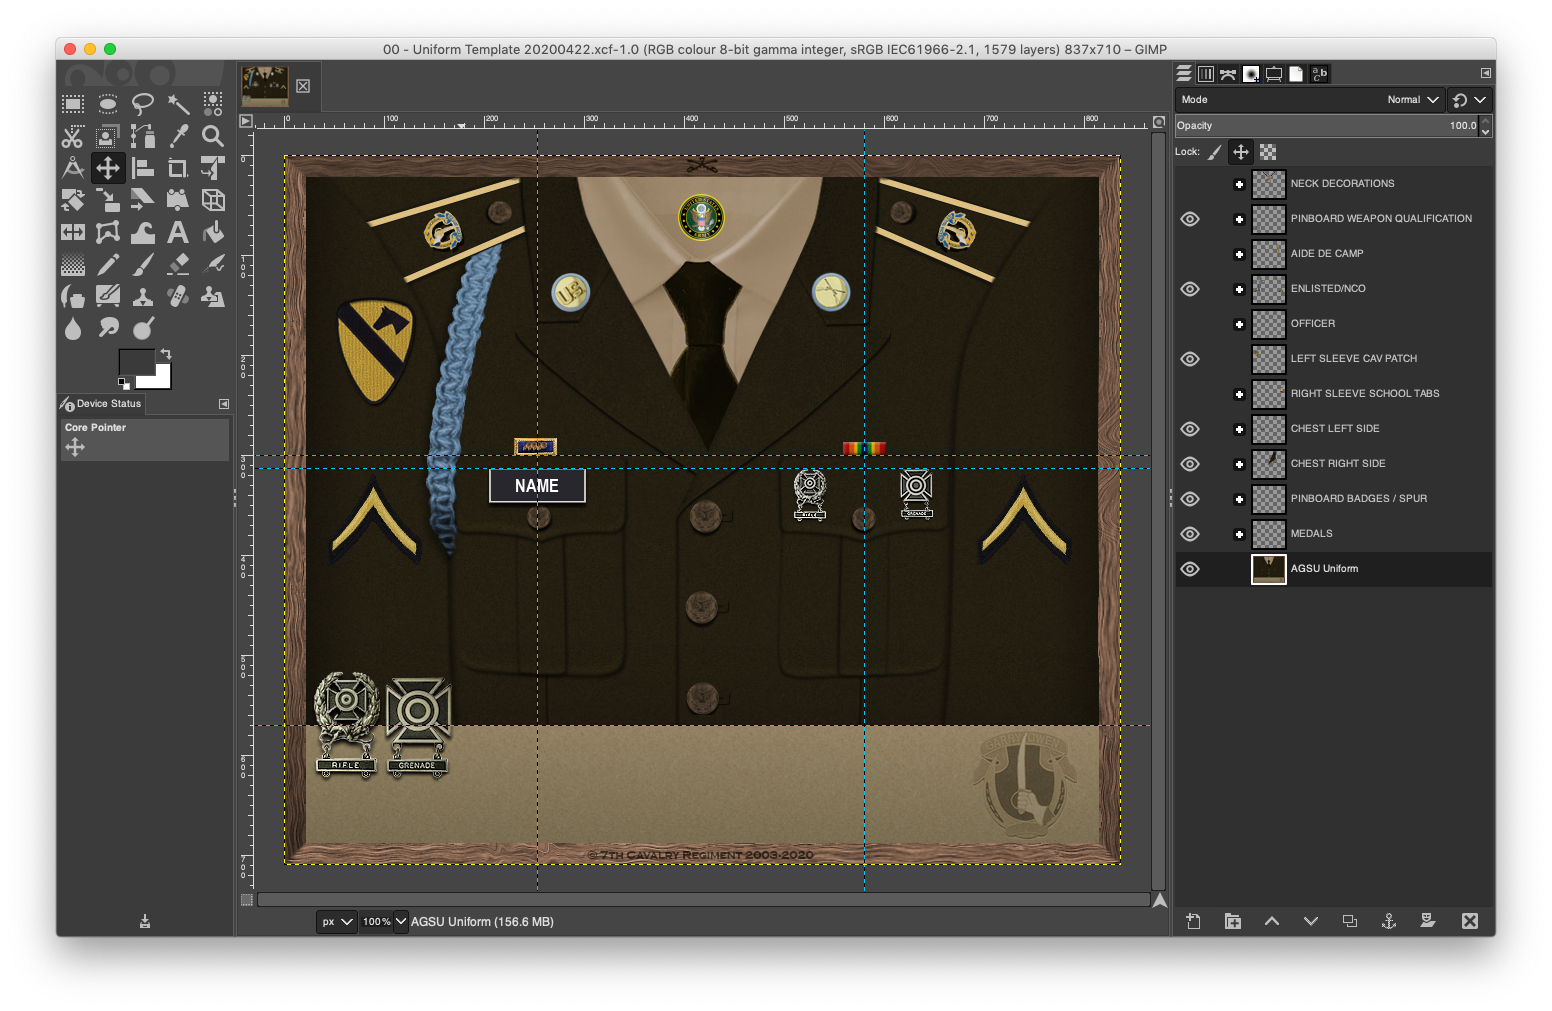
On the left you will see the Toolbox panel and on the right the Layers panel. If you do not see these panels, navigate via: Windows - Toolbox or Windows - Dockable Dialogues - Layers.
There are three tools you will commonly use. These are the Move, Zoom and Text tools.
The MOVE Tool
The Move tool [IMG] (or press M) can be used in two ways. The options are 'Pick a layer or guide' and 'Move the active layer'.
'Move the active layer' is the default option. In order to move an object, you must first select the layer, or parent folder, press 'M' and then click within the object boundary box to drag the layer to a new position. Using this method on a layer group (i.e. a group containing multiple layers within it) the all those layers will move together.
This method MUST be used when moving Medal or Ribbon groups to ensure all attachments are moved with them.
'Pick a layer or guide' may be used to move objects which have no children (e.g. CIB badges or Aviator badges, etc.). This method can be faster since the user need only click on the object and then drag it to a new position. However, this method must NOT be used with medals or ribbons.
The ZOOM Tool
The Zoom tool [IMG] (or press Z) is straightforward. Press Z, then left-click your mouse (LMOUSE) and drag out an area of interest. To adjust zoom, click LMOUSE or left CTRL (LCTRL) to adjust the zoom in or out.
The TEXT Tool
The Text tool [IMG] (or press T) will only be used to create the trooper's surname on the uniform nameplate.
The LAYERS Dialogue Box
The layers box contains all elements in the uniform - ribbons, medals, ranks, badges, etc. They are all organized in folders. The majority of folders will contain subordinate folders and layers.
In order to get one of the objects (or group of objects) from the layers panel to appear on the uniform, click the box to the far left of the layer. An eye should appear where you clicked and that image should now be in the uniform. Hiding an object works the same way.
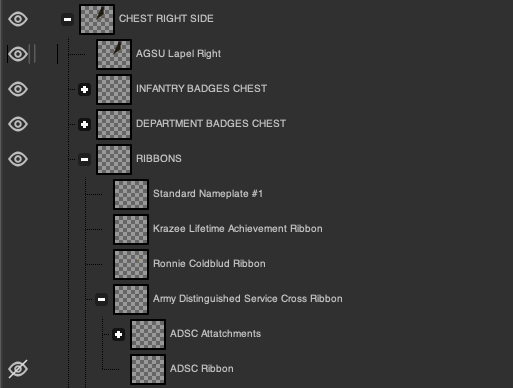
All of the above groups expand to reveal sub-groups or layers. Next to every folder is a small “+” icon on the left side. If you click it, the folder will open, showing its contents. Some folders have subfolders for further organization. To collapse a folder, there will be a “-“ icon in the same spot the “+” once was.
The following example shows the construct of part of the CHEST RIGHT SIDE layer.
The Nameplate
The nameplate comes in two length, Standard and Long. Only if the name is too long to be fully visible on the long nameplate, the size can be altered at your discretion.
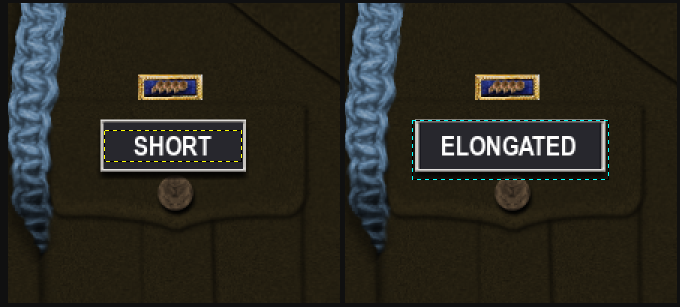 Everyone's name plate should use the same font and font size:
Font: Arial Narrow Condensed Bold
Size: 18
If, even using the elongated nameplate, the trooper's name will not fit, then it is at the discretion of the clerk to reduce the point size of the font until the name fits.
The dimensions of the nameplates must not be altered.
Creating a new Uniform
When Creating a new trooper uniform, use the following steps.
- Open the Uniform template.
- Click File, then "SAVE AS".
- In the XCF folder "SAVE AS" the troopers name. Written as follows, "lastname-firstname" All lowercase.
- Hit "SAVE" - you can make the uniform.
- Then "SAVE" and export to the appropriate awaiting check folder.
Medals and Ribbons
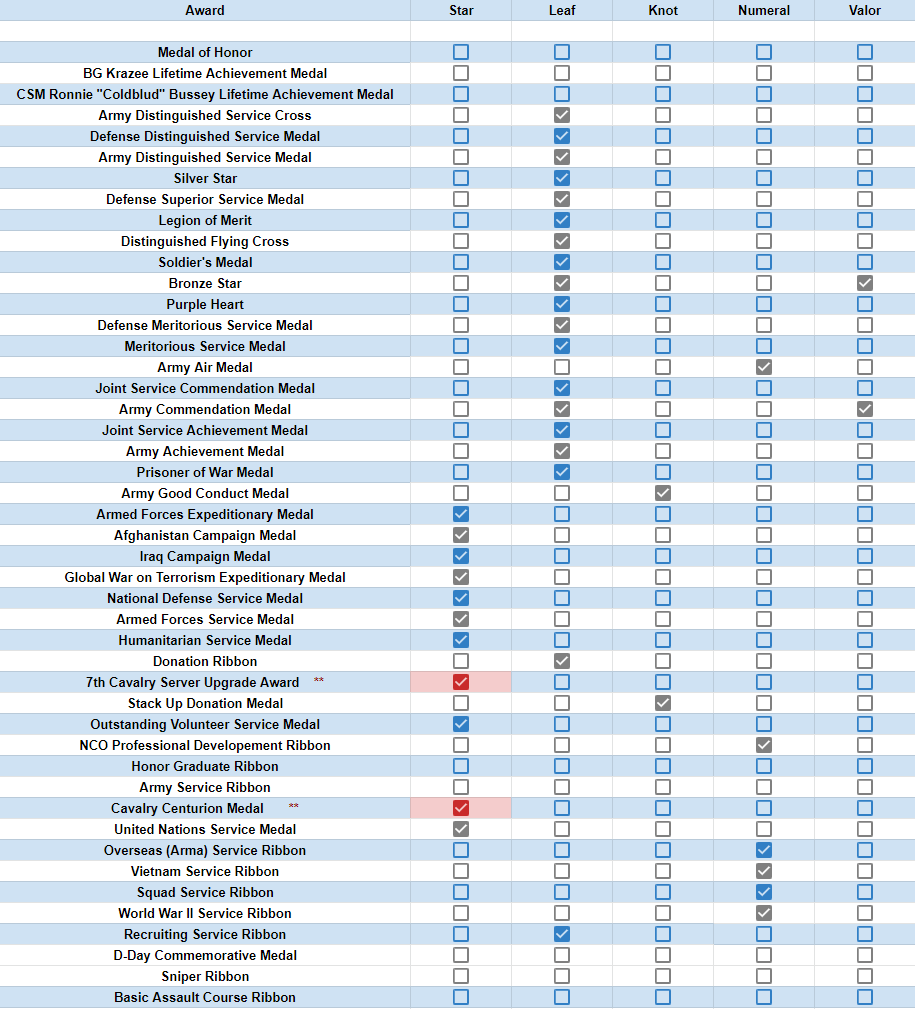
Medals and Ribbons are awarded for a variety of different reasons (Promotions, Combat, Meritorious Service, Class Completions, etc.). There is a specific order that ribbons and medals must be in when being added to a troopers uniform. The correct order of Medals/Ribbons is as follows for most prestigious (top) to least prestigious (bottom). The following chart also shows the attachment(s) that should be used for each award.
Any cell highlighted in RED means that there is more information in the "Attachments" section below. Each medal and ribbon that is awarded to a trooper must be placed on their uniform with respect to the list above.
Ribbons
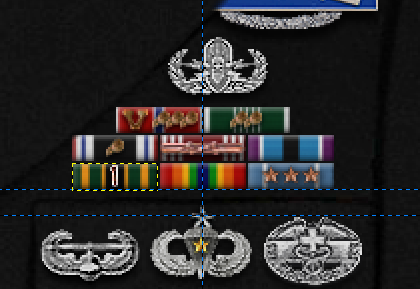
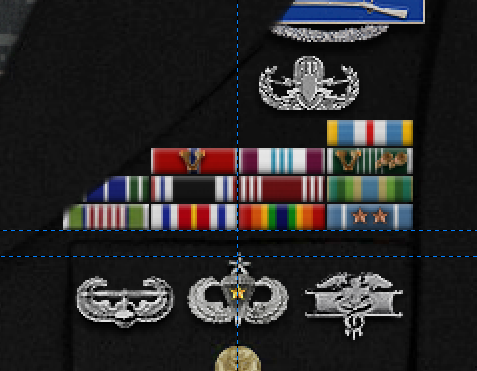
Ribbons are placed on the Chest (right) of a troopers uniform. The most prestigious ribbon will always be at the top left, and the least prestigious will always be at the bottom right. This needs to be done while still keeping all the ribbons centered in line with the button on the right pocket of the uniform.
There must be a 1 pixel gap between ribbons on all four sides. This is easy to do if you use the Zoom tool and select an area around the ribbon stack. The ribbon arrangement should remain as 3 columns until the trooper is awarded his/her 12th ribbon. At that time, the arrangement will change to 4 columns and it will no longer be centered in line with the pocket button. Instead, it will be aligned to the right. The 1st and 2nd rows will have 4 ribbons, 3rd, 4th, and 5th rows will contain 3 ribbons, the 6th and 7th rows will contain 2 ribbons, etc.
Medals
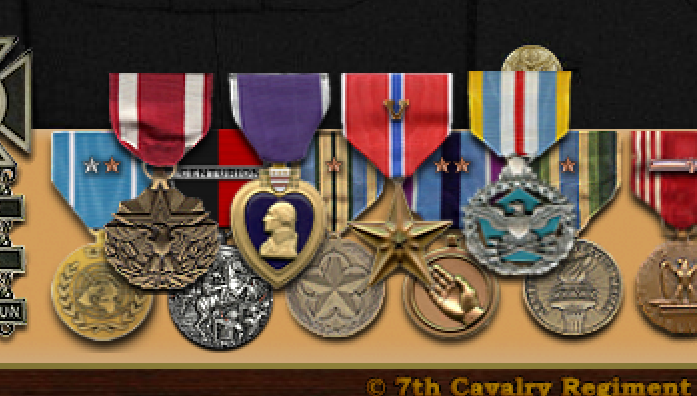
Similar to ribbons, medals are also placed in a specific order. Medals are placed on the pinboard at the bottom of the uniform, least prestigious on the left, most prestigious on the right. As a trooper gains more medals, they will eventually no longer be able to fit on the pinboard and the pattern will be continued on a second row above the first. Each medal on the second row will placed between the 2 medals underneath it.
When adding Medals to a uniform, make sure that the first row of medals at the bottom are lined up with the top of the pinboard. This maintains a cleaner look.
Attachments
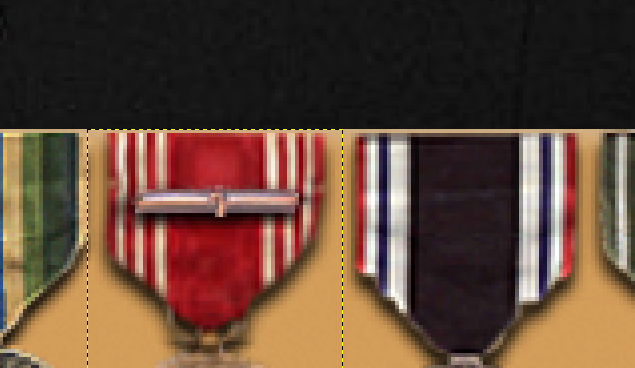
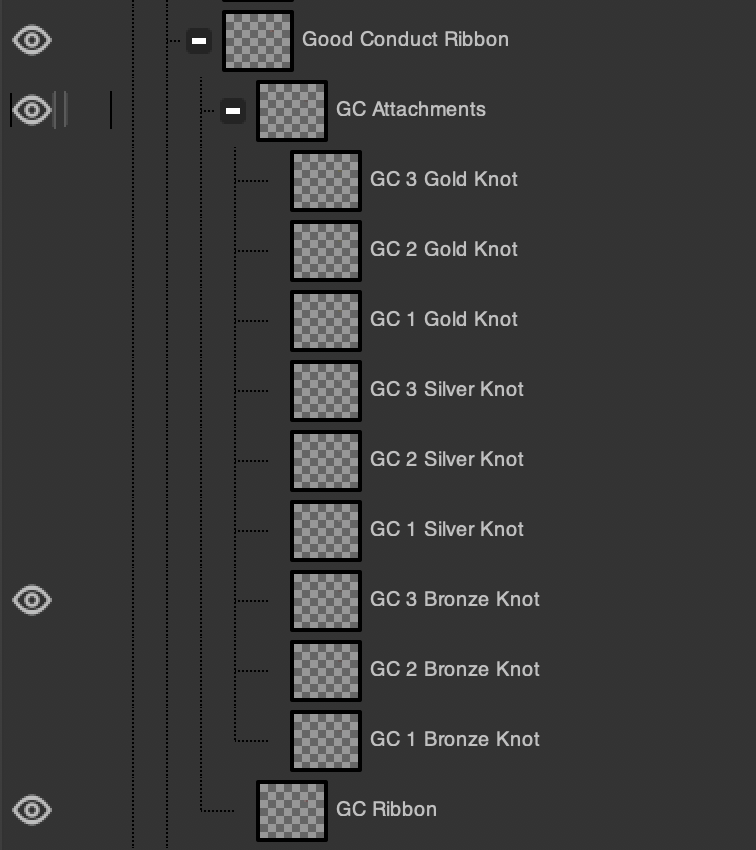
Attachments for medals and ribbons are necessary when a trooper receives multiple of the same medal or ribbon. If you need to add an attachment or device to a medal, open the medal group and enable visibility on the relevant attachment. All medals only have attachments specific to them whether they be leaves, stars, knots, numerals or the valor device.
In the example shown below, a trooper has earned a third bronze knot to their GCM. Open the layer group, enable visibility on the 3rd knot and doable visibility on any other attachments.
Leaves
Adding leaf clusters to ribbons and medals is simple and follows the same method as medals (see above). A trooper will receive 1 bronze leaf cluster for every duplicate ribbon/medal (if it uses leaf clusters) after the 1st. For example, the second MSM a trooper receives will warrant 1 bronze leaf, the 3rd award will warrant 2 bronze leaves, etc. A silver leaf is equivalent to 5 bronze leaves (6th award). A gold leaf is equivalent to 10 bronze or 2 silver leaves (11th award).
Some examples:
- 1st Award = No Attachments
- 2nd Award = 1 Bronze Leaf
- 5th Award = 4 Bronze Leaves
- 6th Award = 1 Silver Leaf
- 7th Award = 1 Silver Leaf and 1 Bronze Leaf
- 10th Award = 1 Silver Leaf and 4 Bronze Leaves
- 11th Award = 1 Gold Leaf
Game Centurion Medals and Ribbons
Each game that is of company size is eligible for it's own game centurion medal and ribbon. This medal and ribbon, with replace the old centurion medal, and instead give each specific game a ribbon and medal. Each will have leaf attachments to signify the number of operations attended in that game. Once a game is no longer supported, the medal and ribbon will be retired. Below are levels for the leaf attachment.
- 50 - 1 Silver Leaf
- 100 - 1 Gold Leaf
- 150 - 1 Gold and 1 Silver Leaf
- 200 - 2 Gold Leaves
- 250 - 2 Gold and 1 Silver Leaf
- 300 - 3 Gold Leaves [Max Award]
Stars
The star attachments for ribbons and medals work exactly the same as leaf attachments. 1 Silver equals 5 Bronze. 1 Gold equals 2 Silver or 10 Bronze.
Exceptions to the above rule:
- The Cavalry Centurion and Server Upgrade medals. The Server Upgrade medal will receive a silver star attachment for a donation of $50 and a gold star attachment for a donation of $100. The Cavalry Centurion medal will receive one silver star attachment for every subsequent award.
- Donation & Recruitment ribbons. These ribbons use star devices and are awarded in the following order:
- 1st Award - Ribbon - [Donation Ribbon or Recruitment Ribbon]
- 2nd Award - 1 Bronze Star
- 3rd Award - 2 Bronze Stars
- 4th Award - 3 Bronze Stars
- 5th Award - 4 Bronze Stars
- 6th Award - 1 Silver Star
- 10th Award - 2 Silver Stars
- 15th Award - 3 Silver Stars
- 20th Award - 4 Silver Stars
- 25th Award - 1 Gold Star
- 50th Award - 2 Gold Stars
- 75th Award - 3 Gold Stars
- 100th Award - 4 Gold Stars [Maximum award]
Any medal or ribbon that earns star attachments is capped at a gold star (the 11th award) with the exception of donation and recruitment ribbons as stated above. Once a gold star is earned, the trooper can't get any more on that medal or ribbon.
Valor Device
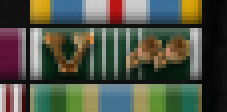
The valor device is only given for a couple of awards, most notably for the Army Commendation Medal/Ribbon, and the Bronze Star Medal/Ribbon.
Valor attachments aren't given out like leaves or stars. When a trooper receives an Army Commendation or a Bronze Star medal, they will sometimes include a "w/ Valor" along with them. This is added for events that occurred in combat. The valor attachment does not replace the leaves. A trooper can only receive 1 valor attachment per type of award.
If only one award has been made of a medal, the Valor device is centered on the ribbon. If the trooper has already won the award the Valor attachment is positioned to left side of the ribbon/medal and leaves are aligned to the right side of the medal/ribbon.
Knots
Knot attachments are only used for the Good Conduct and Stack-Up Donation medals.
Good Conduct Medal:
- 1st GCM = No Attachment
- 2nd GCM = 1st Bronze Knot
- 3rd GCM = 2nd Bronze Knot
- 4th GCM = 3rd Bronze Knot
- 5th GCM = 1st Silver Knot
- 6th GCM = 2nd Silver Knot
- 7th GCM = 3rd Silver Knot
- 8th GCM = 1st Gold Knot
- 9th GCM = 2nd Gold Knot
- 10th GCM = 3rd Gold Knot
Stack Up Medal: The attachment is based on the amount of the donation.
- $25-$49 = No Attachment
- $50-$99 = 1 Bronze Knot
- $100-$199 = 1 Silver Knot
- $200+ = 1 Gold Knot
Numerals
These attachments are also only used for a few different awards. These include:
- The Army Air Medal
- The NCO Professional Development Ribbon
- Overseas (Arma) Service Ribbon
- ACV Service Ribbon
- Squad Service Ribbon
- WWII Service Ribbon
The Army Air Medal is very straight forward when it comes to attachments. 1st Award = No Attachment, 2nd Award = “1” Attachment, etc. The same rule applies for the 4 Service Ribbons.
The NCO Development Ribbon works differently. In order for a person to receive the NCO Ribbon, they must earn the rank of Sergeant. An attachment is then added for every NCO rank that trooper earns after Sergeant.
- Sergeant: NCO Ribbon with No Attachment
- Staff Sergeant: “1” Attachment
- Sergeant First Class: “2” Attachment
- Master Sergeant: “3” Attachment
- First Sergeant: “4” Attachment
- Sergeant Major: “5” Attachment
- Command Sergeant Major: “6” Attachment
Note: If a trooper is a Sergeant First Class and they get demoted to a Staff Sergeant, the attachment on their NCO Ribbon does not change. The attachment on their NCO Ribbon should always represent the highest rank they have held as and NCO.
Cords and Branch Insignia
Cords (fourragere) and Pins are placed on uniforms to distinguish the Primary Billet or MOS of a trooper (aviation, armor, infantry, engineer, medic, etc.). In order to check a trooper's MOS check either their MILPAC or their assignment posting on the 7th Cav forums.
Cords
Cords are ONLY given to NCOs and Enlisted troopers. If a trooper is promoted to officer, the cord is taken away. (With the exception of officers who have a role as Aide to Regimental Staff)
The most common types of cord given out are as follows...
- Infantry - Light Blue Cord (only issued to soldiers with an MOS of 11B (Infantryman) or 11C (indirect Fire Infantryman).
- Armor - Yellow Cord (B/2/C/2-7 section)
- Medic - Purple Cord (3/B/1-7 platoon only)
- Engineer - Red and White Cord (not used as of 2019)
- MP - Green and Yellow cord allocated to fully qualified MPs
- Artillery - Red cord (HLL section E/2/C/2-7 only)
- Aiguillettes - Yellow Cord (Only for Roles that are Aide to Regimental Staff)
A/1-7 company (Aviation) and 2/B/1-7 platoon (Cavalry Scouts - MOS 19D) are the only compositions who do not wear a cord.
Branch Insignia
Branch insignia (pins) are worn on the lapels and give a visual indication of the branch the soldier belongs too. Within our community, this is also an indication of that soldier's MOS.
There are 2 different sets of pins for use by Enlisted/NCOs and by officers.
The common NCO / Enlisted Trooper Pins are:
- Infantry
- Cavalry
- Armor
- Medical
- Aviation
- Artillery
Note: The Infantry Pin is the only pin that should be accompanied by the US Pin with the matching light blue disk around it.
There is a wider variety of Officer Pins because officers may hold more types of primary billets aside from the normal battalion combat roles. These other roles include departments such as S6 (IMO), SPD, Military Police, JAG, etc.
All officer primary billet pins are accompanied by the US Officer Pins on both sides of the collar.
Service Stripes
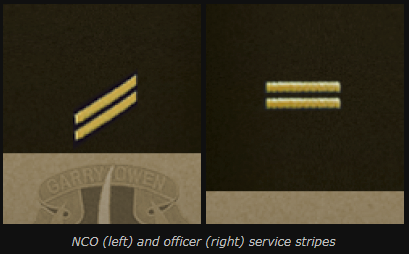
There are two types of service stripes that can go on the uniform. There is one type for enlisted troopers and NCOs and another for officers. Both types represent a year of active service. The easiest way to determine how many stripes a person should have is by looking at their Good Conduct Medals. For example, if they have 2 GCMs, they should also have 2 service stripes. Because both the service stripe and the GCM mean the same thing, make sure that every time a trooper is awarded a GCM, they are also getting a service stripe.
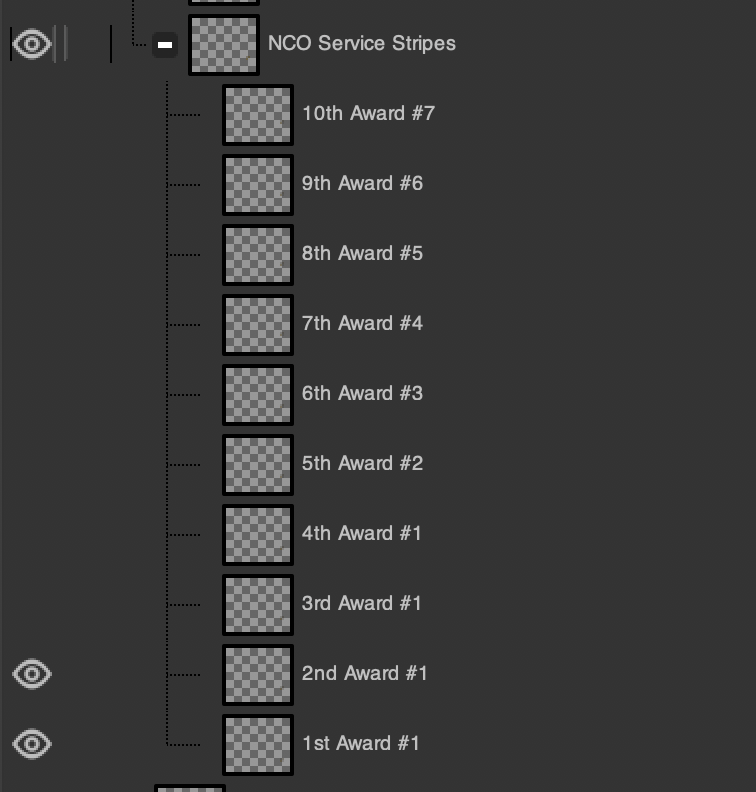
The Enlisted / NCO service stripes are located on the right sleeve of the uniform. There are a maximum of 10 stripes, all of which are on the uniform by default. Simply open the layer group and enable visibility on the additional stripe.
Officer stripes are located on the left sleeve. and work in exactly the same way as NCO stripes.
Unit Citations
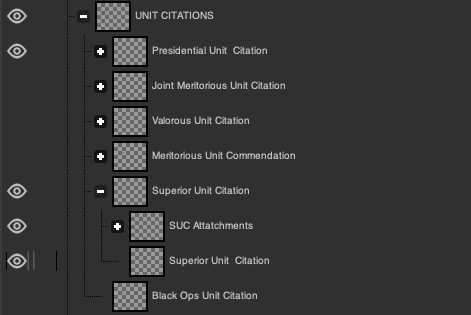
Citations are awarded to groups of people rather than individuals. They work the same way as ribbons when being placed on the uniform. They are located just above the nameplate on a trooper's uniform. Most prestigious on the top left. Least prestigious on the bottom right. The citations in the GIMP layers are in the correct order (Most prestigious on top). Similar to ribbons, the citations must also be center in line with the pocket button.
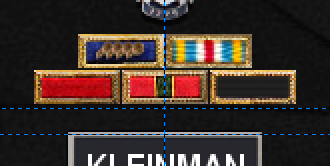 There must always be a 1 pixel gap between all citations on all four sides.
Citations, and their associated attachments, are grouped as are ribbons and medals. If a citation is awarded for a second time, simply opens up the attachment group for the award and enable visibility on the second/third/fourth etc. awards.
Infantryman Badges
Infantry Badges are awarded for participation in official combat operations.
- The Expert Infantry Badge = Awarded for 1st operation
- The Combat Infantry Badge = Awarded for 5th operation
- The Combat Infantry Badge 2 = Awarded for 10th operation
- The Combat Infantry Badge 3 = Awarded for 15th operation
- The Combat Infantry Badge 4 = Awarded for 20th operation
These badges should be placed above the ribbons on the right side of the uniform. They should be centered along with the ribbons, however, if the right collar is blocking most of the badge, simply shift the badge slightly to the right so that the stars on the top of the badge are showing.
Course Completion Badges
There are a variety of different badges that can be given out to our members by completing courses and evaluations. They are as follows:
- Basic Jump Wings
- Senior Jump Wings
- Master Jump Wings
- Air Assault Badge
- Basic EOD Badge
- Senior EOD Badge
- Master EOD Badge
- Basic HALO Wings
- Master HALO Wings
- Flight Medic Badge
- Combat Medic Badge
- Expert Field Medic Badge
- Army Aviator Badge
- Senior Aviator Badge
- Master Aviator Badge
- Aircrew Badge
- Senior Aircrew Badge
- Master Aircrew Badge
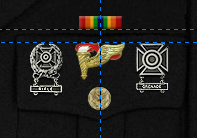
Each uniform is only allowed a maximum of 3 badges on the right pocket underneath the ribbons. Weapon Qualifications are replaced by badges in order to fit all 3 badges. The least prestigious qualifications are replaced first. As the more prestigious awards are added, space permitting; the least prestigious awards will be removed from the uniform, and will instead be displayed in the troopers milpac only.
Aviation and Infantry MOS related badges will only be displayed inside that MOS. For example, Pilots will not have Infantry badges on their Uniform, and Infantrymen will not have Aviator Wings. The only exception to this rule, is if an aviation MOS trooper, hasn't yet earned an aviation badge, or vise versa.
The list of awards this applies to is below:
- Army Aviator Badge
- Senior Aviator Badge
- Master Aviator Badge
- Aircrew Badge
- Senior Aircrew Badge
- Master Aircrew Badge
- EIB
- CIB
- CIB2
- CIB3
- CIB4
Jump Wings
The Basic Jump Wings are awarded after a trooper completes the Basic Airborne Course. Once a trooper has earned his/her Basic Jump Wings, they are now eligible to receive Jump Star attachments on their wings. They are awarded up to 5 combat jumps that take place in operations, the 5th jump receiving a gold star. All the versions of the Jump Wings with different amounts of stars are already in the layers section in GIMP.
Once a trooper completes the Jump Master Course, their Basic Jump Wings are replaced by the Senior Jump Wings (whatever stars were on Basic Jump Wings are carried over).
A trooper is awarded their Master Jump Wings if he/she instructs the Jump Master Course (Again, any stars are transferred over).
HALO Wings
HALO Wings work in a similar way to the Jump Wings. The Basic HALO Wings are awarded for successful completion of the HALO course and the Master HALO Wings are awarded for instructing the course.
HALO Wings also receive jump stars the same way as Jump Wings (1 bronze star per jump, the 1 gold star for the 5th). Like Jump Wings, the Jump Stars get carried over with the upgrading of the badge. All the necessary images are in the layers section in GIMP.
Medical Badges
The Expert Field Medic Badge is awarded for successful completion of the Combat Medic Course. It is replaced by the Combat Medic Badge which is awarded for filling the role of a Medic in an operation (Awarded by the OIC of the operation).
EOD Badges
The Basic EOD Badge is awarded upon successful completion of the Basic EOD Course. It is replaced by the Senior EOD Badge which is awarded for successful completion of the Advanced EOD Course. The Master EOD Badge replaces both the Basic and Senior variants and is awarded for instructing the EOD Course.
Aviation and Aircrew Badges
The Army Aviation Badge is replaced by the Senior Aviator Badge which itself is replaced by the Master Aviator Badge. The Aircrew badges work the same way.
Department Crests
Crests and badges are given to troopers who are assigned to secondary billets outside their normal combat roles. Some examples of secondary billets are the S Shops, Military Police, RTC (Recruit Training Center), and the Recruiting Department.
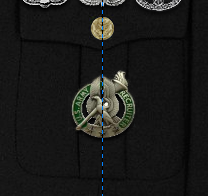
Crests are placed on a trooper's uniform right above their unit citations and name plate on the left side of the uniform.
Only one departmental crest can be worn on the uniform at any one time. However, if a trooper has won the Armed Forces Service Medal for previous service to a department, then that departmental crest can be displayed on the pinboard. The following crests are those currently authorised for use.
Department Badges
Badges are placed on the right side of a trooper's uniform.
The following badges are located on the lower portion of the right pocket..
- Recruiter (RRD) Badge
- General Staff Badge
- Drill Instructor (RTC) Badge
- MP Badge
- CID Badge
- Instructor Badge
The Instructor Badge has 3 versions. The Basic Instructor Badge is given to all instructors. The Senior and Master Instructor badges are statutory upon the instructor having taught 15 and 25 classes respectively. Both the RRD and RTC badges have a Gold version which is given out to the heads / leads of the department and it replaces the basic badge.
Retention of Departmental Crests
Upon leaving their department, any trooper who has been awarded a Gold, Senior or Master Recruiter Badge, or a Senior or Master Instructor badge (hereinafter referred to as statutory badges), will be entitled to retain and display those badges of office on the right side of their uniform pin-board when they leave their department. This entitlement will be irrespective of any award of the Armed Forces Service Medal (AFSM).
Troopers who have been awarded a statutory badge, and remain active within that department, and additionally serve in a tertiary billet which entitles them to wear an additional badge of office, will be allowed to display their statutory badge on the right side of their pin-board. For example, if a trooper is a fully qualified MP and, in addition, has achieved a Gold Recruiter badge, then that trooper would be entitled to wear their MP badge on their left pocket and display their Gold Recruiter badge on the right side of their pin-board.
Those who have qualified to wear any of the standard badges of MP, Recruiter, or Basic Instructor will, upon leaving their respective departments, have their badges removed from their Uniform and will not be entitled to have those badges on their pin-board.
Those who have worked in a department and have been awarded the AFSM for services to that department, will be entitled to display the relevant departmental crest on the left side of their pin-board whether that be S1, S2, S3, S5, IMO, WAG, ROO/RRD/RTC, MP or JAG.
In the event there is not space on the right or left side to fit the specific above awards, then placement is at the best discretion of the Clerk and Uniforms Lead.
The following badges are located in the same place as the course completion badges:
- Pathfinder Badge
- Master Gunner Badge
Tabs
Tabs are worn on the right sleeve. These include the:
- Special Forces Tab (SF)
- Ranger Tab
- Sapper Tab
- Long Range Reconnaissance Patrollman Tab (LRRP)
The topmost tab must be worn parallel to the top of the Cavalry Division patch worn on the left sleeve.
 All Crests and Badges for a trooper's billets are not all necessarily permanent. If a trooper drops or is removed from a billet, they will have their crest or badge removed unless they have received an Armed Forces Service Medal for that department. If they were in the department long enough to receive an AFSM, the crest or badge is then moved to their pinboard.
If they have an AFSM for the department and they leave that department, the crests go to the left side of the pin-board, typically under the weapon qualifications.
Weapon Qualifications
Weapons qualification are located on both the pinboard and right pocket of the uniform. The qualifications on the pocket will eventually be replaced by Course Completion Badges: the higher qualifications being the last to be replaced. The qualifications on the chest should have a maximum of 3 attachments. Any additional weapon attachments should be left out from the uniform, but present on the pinboard.
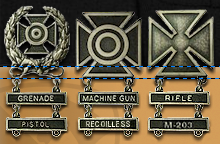
There are 3 types of qualifications a trooper can get. Expert (highest), Sharpshooter, and Marksman. When being placed on both the pinboard and the right pocket, always place the highest qualifications on the left and the lowest on the right.
Only the two highest qualifications should be placed on the chest. For example, if a trooper scores Expert for Rifle, Sharpshooter on Grenade and Marksman on Pistol, then only the Expert and Sharpshooter qualifications appear on the chest while all three will appear on the pinboard.
There are a variety of different weapons that troopers can qualify with:
- Rifle
- Grenade
- Tank Weapons
- M203 Launcher
- Machine Gun
- Recoilless Rifle
- Pistol
- Aeroweapons
- Carbine
- Auto Rifle
- Hydra 70
These weapon attachments above are in order as they should appear on the uniform. For example, if a person has an expert qualification with both the rifle and the grenade, the rifle should always be on top.
 Weapon Re-Qualifications
If a trooper re qualifies with a weapon and receives a different score, their uniform should always reflect the most recent qualification, for better or worse.
Helpful Information
Below is a collection of helpful links and information that may provide you with further assistance you may need.
Gimp Keyboard Shortcuts
| Key Combination | Function |
| SHIFT + CTRL + D | Duplicate Layer |
| M | Select Move Tool |
| T | Select Text Tool |
| PAGE UP | Select Previous Layer |
| PAGE DOWN | Select Next Layer |
| HOME | Select Top Layer |
| + | Zoom In |
| - | Zoom Out |
| SPACE + DRAG MOUSE | Change cursor to allow quick pan to another view |
| CTRL + MOUSE ROLLER UP OR DOWN | Zoom in or out |
| MOUSE ROLLER UP OR DOWN | Scroll up or Down |
| SHIFT + MOUSE ROLLER UP OR DOWN | Scroll Left or Right |
| CTRL + S | Save |
| CTRL + SHIFT + E | Export Image As |
The Awards and Decorations page can be located here.
